Thursday, December 15, 2011

The A/C is in.........and other stuff.

I don't have any pictures of the new duct work, but I don't think that you would even be interested. :) Air conditioning is definitely a function over form thing. We ended up getting a very efficient unit that should save us a lot on our utility bills. This is huge. In both of our other houses we've had inefficient and old units. As a result, our bills have been out of range for our square footage. This will be a welcome change.

One thing I have been doing is planning out the kitchen. This weekend I used a kitchen planner to lay it all out.

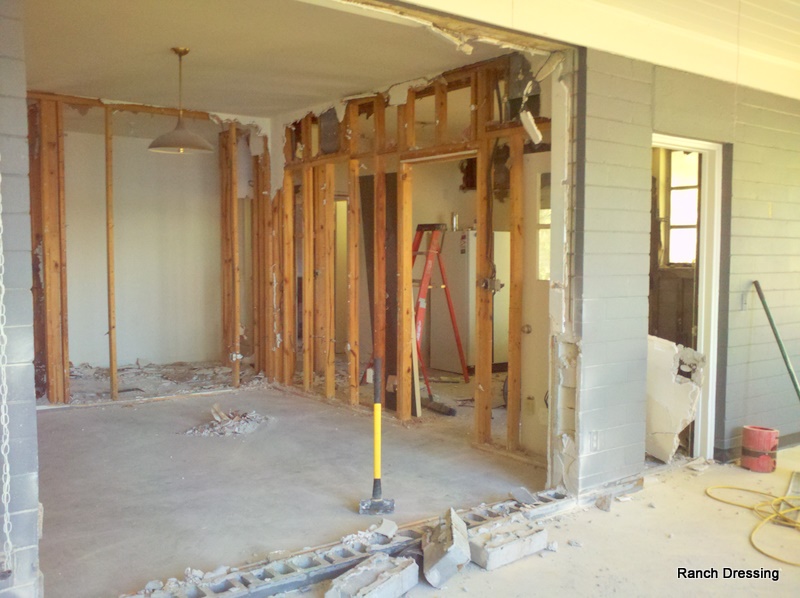
The top of the picture is the back of the house. That whole wall will be windows and french doors. You can see the support wall on the lower right and on the lower left that little wall isn't really a random wall, that's the entry into the pantry and the wall into the family room.


Here are some real life renderings:


The wall above the oven will have counter to ceiling wall tile.


For some reason the program will not let me put cabinets above the fridge and in that corner. There will be cabinets there in real life. Plus, the fridge will be contained inside a built in cabinet.


So that's what I was able to do with the kitchen planner. We are using white shaker style cabinets in this house, just like we did in the first two houses. I'm in a rut. It's just like Jen and her Restoration Hardware paint. They will follow me wherever I go. I love them.

The one difference this time is that we are going to stack a smaller cabinet above the full size cabinet. Here are some inspiration pictures I got off the Internet.


-photo from www.4men1lady.com

The cabinets we are purchasing don't have a glass option for that small size. We plan on popping out the center panel and installing the glass ourselves.


-photo from http://justinetaylor.tumblr.com/post/11543805117

Lastly, I just found this light from Shades of Light and I love it. I plan on putting about three of them above the bar. Now I just need to convince my better half. They may be a little "out there" for him.

Tuesday, November 15, 2011

More Demo................

So things are really moving along. It's easier for me to visualize things and make decisions when the walls start coming down.

This is the view from the back, south corner of the house...as if you were sitting in the future family room. That portion of wall on the right has just been removed and the section of wall remaining is going to stay. It was a structural decision. The beam would have been way too big to support the roof. I don't know if a beam that big doesn't exist or would have been way too expensive. Either way, we'll make it work.


This is the view from the front door.


This is what you see when you are walking towards the north side of the house. The missing wall used to separate the dining room from the old kitchen. We are going to turn the old kitchen into the new pantry and laundry room.


This view is as if you are standing in the new kitchen and looking back towards the front door. That doorway to the right used to go into the old kitchen. That will now be the doorway into a new pantry. I am excited about all that space. We've never had a walk in pantry before. I have visions of perfectly organized staples. Ha, Ha. Maybe if I hire a life coach.


This is a view straight into the dining room. The back wall was removed. The space to the left was part of the garage and housed the water heater. The space to the right was the old pantry. We plan on taking half of the space to make a larger dining room and the other half of the space will go towards the girls' new bedrooms.


This is the dining room with the pantry door to the right.


So that was the wall separating the dining room from the old kitchen. The new set up will have a door that leads back to the laundry room and the girls' part of the house. We haven't decided if we are going to use the current doorway or move it down the wall a bit. I think it will stay where it is more than likely. That should flow better. We don't want it to feel like you need to walk around the dining room table to get back there.


This is our upstairs hallway with the ceiling gone.


So that's how far my hubby and his crew got as of this past weekend. I'm giddy! I love this stuff! The girls are also having fun hanging out at the house. I am glad. I have fond memories of hanging out at my childhood home when it was being built. I hope they look back and feel the same way.


Tuesday, November 8, 2011

It's demo day!

I am sooooooooooooo excited. You have no idea. My hubby had me meet him over at the new house before work so we could talk about where the a/c unit was going to be located. To my surprise, when I walked in, things were already being torn out. Woo hoo!

This is a view from the living area looking towards the bedrooms and front door. We are removing that doorway that leads down the hall and turning it into a larger opening. We are also pulling out that partition wall by the front door.


This is a closer shot of that half partition wall. The wall itself had a planter in it and you can see the funky glass slats on the top. I bet that was very fancy in the early 50's.

My husband is removing the trim around the door in order to make a larger opening.


So now we are looking up into that hallway. For some reason when you go up the stairs, there's a soffit that extends down the hallway and partially into each bedroom. It takes the ceilings from about 9.5 feet tall to less than 8 ft tall. It feels tight. That's Tim up on the ladder taking the ceiling out.


That's all the insulation falling down!


So that's how my day started! I wish I could have stayed and helped.

Saturday, October 22, 2011

Our Big Announcement!

We are moving! We found another fixer upper on a great lot in a great neighborhood. Luckily it's ranch-style home built in 1951, so we won't have to change the blog name.

This house needs more work than we've ever had to do to one of our houses, but the bones are great. We are going to do a few things before we move in, but we'll have to wait until we sell our current house to really make a dent.

This is the front of the house (or the back, depends on who you are talking to). More on that later.


The house sits on a large, wooded lot. There are oak trees, magnolia trees, fruit trees, palm trees, and many other trees that I can't identify. Apparently in the first half of the 1900's the neighborhood used to be a citrus grove. We have three different types of oranges and key limes. Our neighbor also told us that one of the trees we have is an experimental orange from the University of Florida. That's kind of cool.


So I'll make this announcement now for all our friends and family. From now on there will be no need to pick up limes for the Coronas or margaritas. Ha, Ha.


This is the view from the backyard.


We will need to build a dock and put in a pool.


This is the back of the house. Well we call it the back, but our neighbors may call it the front. In the good old days, the houses were built with the front facing the river and the back facing the road. Some of the older houses in the neighborhood (Civil War era) look backwards to us.


This is the view from the water. You can see how overgrown it is. My hubby, B, and T have spent all day clearing out the vegetation. Once the vegetation is cleared, sand and grass needs to go in it's place and bulkhead will be installed. You can see our tiny white roof on the left side of the picture.


So that's our exciting news. I have about 100 more pictures of the interior of the house, but I will save them for future posts. With all the work we are going to be doing, this blog should stay very busy!

Sunday, October 16, 2011

It's Spooky Season

I got the inspiration for these off of Pinterest. The pin that grabbed my attention had little orange pumpkins as the filler and tall brown branches. I set out to find the same thing, but when I got to Michael's I was sidetracked by the multi-colored gourds and wheat.


Obviously this project was easy, but it was/is hard to get the two vases to match. I think one of the vases has a thicker base which makes it hard to get the height of the wheat the same. It was also a little tough to get the wheat to spread out evenly.


Moving on......

This is a cute little Halloween tree my mom showed up with. I'm not sure if she made it or bought it, but I like it.


This is the front entry.


We've had those wicker pumpkins for about 5 years and the orange flowered branches are out year around. Orange is my favorite color so I usually have pops of it in every room.

The new seasonal additions are the skeleton garland and black crow.


They were both a $1 at Dollar Tree. Sweet!


So this is how we are starting off the season. Bring on the trick-or-treaters.


I should have a big announcement this week, but I'll save it. I don't want to jinx us!

Saturday, July 2, 2011

Progress Update

We (my husband and his crew) did it! We got a bulk of the work done with a day to spare before the party. These pictures were taken at 10pm when the last wood planks went down.

As you can see, the room looks much bigger and brighter.


We have a new higher ceiling, recessed lighting, a fan to be installed today, no more rock wall fireplace, new walls, and a new floor.


When you look at the picture you can see how much we raised the ceiling. The ceiling used to be at the same height as the top of the cut out. That was the old fireplace which will now be a desk nook. You can also see he angled the ceiling to get as much height as he could. We call it the barn now. :)


The cleaning crew.


This is all the wood we have left after re-flooring almost the entire house. Not bad. One interesting thing is that you can tell how much wood floors fade after you lay them. The rest of the floors in our house were laid a year and a half ago. When we put these down you can see that they look much more red than the ones in the kitchen right next to them. It shouldn't be long before the sun gets to these and they match.


So this is after we loaded the toys back in. Don't get used to this! The next step for this room is a back wall of built in cabinets and shelves. If I can get my kids on board with picking up after themselves (fat chance), all those toys will have a place.

That rug is new. I picked it up at Home Goods. I think it will work because the back round color matched the rest of the house and the flower pattern has the light orange color of the future walls. It should keep the room connected.


If you scroll down to the post below you can see what a big difference this is! Yay!

Wednesday, June 22, 2011

The Before...

Like most people, we get the most done on our house right before we are having an event. Our usual energy spurt comes right before Thanksgiving since we host it every year.

My husband informs me last night that he's gutting the girl's playroom. This is good and bad. It's good because I hate that room. It's scary because we are a having party at our house in 11 days.

He swears he'll have it done in a week and who am I to hinder progress? Strike while the iron's hot I always say (never). :)

So here are the befores:


The plan is to remove that rock wall and fireplace, raise the ceiling, install recessed lights, make that entire back wall built ins, and change the floors.

Obviously that won't all get done in a week, but he'll have the dry wall back up and the ceiling done.

That way we can move all the toys back in and get them out of here.


The girls were so sweet this morning. Before they left for camp they helped their Dad move all of the stuff out. They are excited.

(I) Just Wing(ed) It!

Over the weekend I went into Garden Ridge and was stunned to read that the store was closing. Boo! That's my go-to place for cheap crap. Ha, Ha. It's right near my mother-in-laws house and I always stop in when we are over there visiting. After I got over the shock, I was pleased to also read that the entire store was 25% off. Perfect.

I bought 10 different black frames for my gallery wall project. The plan is to frame some great pics I got on our visit to Charleston.

I always see on HGTV that when you hang a gallery wall the best thing to do is lay it out ahead of time on a big piece of paper. You then transfer the paper to the wall and know exactly where to put the nails.

Have you met me? I don't have time for that.

So I just went for it. I went one by one and eye-balled it and I think it turned out great. I still have the stock photos in the frames because I needed to lay it out first so I will know what size and orientation to edit each photo in.


So I lucked out this time, but I couldn't help thinking the whole time I was doing this........."if you don't have time to do it right, you definitely don't have time to re-do it".

I'll post the final pic when I get the real pictures in.

Sunday, June 12, 2011

New Jutes

I have been looking for a rug to go under our dining room table for at least a year. This is how it has been looking.


My main issue has been the price. It's very hard to find a big rug on the cheap.

I read on here that Lowe's had 5x7 jute rugs on clearance. The color, material, and price were perfect, they were just too small.

I had an idea so I ran over there on my lunch break and grabbed the last two.


My idea was to tape two rugs together to make one 7x10 rug. It was a good idea until I tried to execute it. When I unrolled the rugs and tried to match them up I found out they were irregular. I was so disgusted that I didn't take a picture of this part. Ha, Ha.

Since I like the rugs and know I can use them somewhere else in the house I decided to just put them under the table for now. It's definitely not perfect, but I still kinda like it. They don't bother me.


Here are close-ups of the non-match-ups.


The funny thing is that I have a recipe binder on the dining room shelf that has the same color and pattern. It's like it was meant to be, even though it obviously wasn't.


Anyway, the rugs were $34 each, for a grand total of $68. If this would have worked better this would have been a really awesome and thrifty idea. That's a savings of at least $300!

I noticed after I wrote this that the rug is also the same pattern at the curtain panels I was eyeing. Man do I need to step outside the box. :)